Securing APIs
Learning objectives
- Identify how an API is secured
- Design a secure way to integrate an API plugin for Microsoft 365 Copilot with an API
- Integrate an API plugin with an API secured with an API key
- Integrate an API plugin with an API secured with OAuth2
- Run the API plugin in Microsoft 365 Copilot to validate the results
Two common ways of how APIs are secured.
- One of the common ways to secure APIs is by using API keys: API keys are arbitrary strings that API owners issue to grant you access to the API
- Another common pattern of securing APIs is by using OAuth.: OAuth is an industry-standard protocol for authorization. OAuth secures access to resources using access tokens.
Microsoft 365 Copilot supports passing API keys as:
JSON Web Token (JWT)
Query string parameter
Custom header
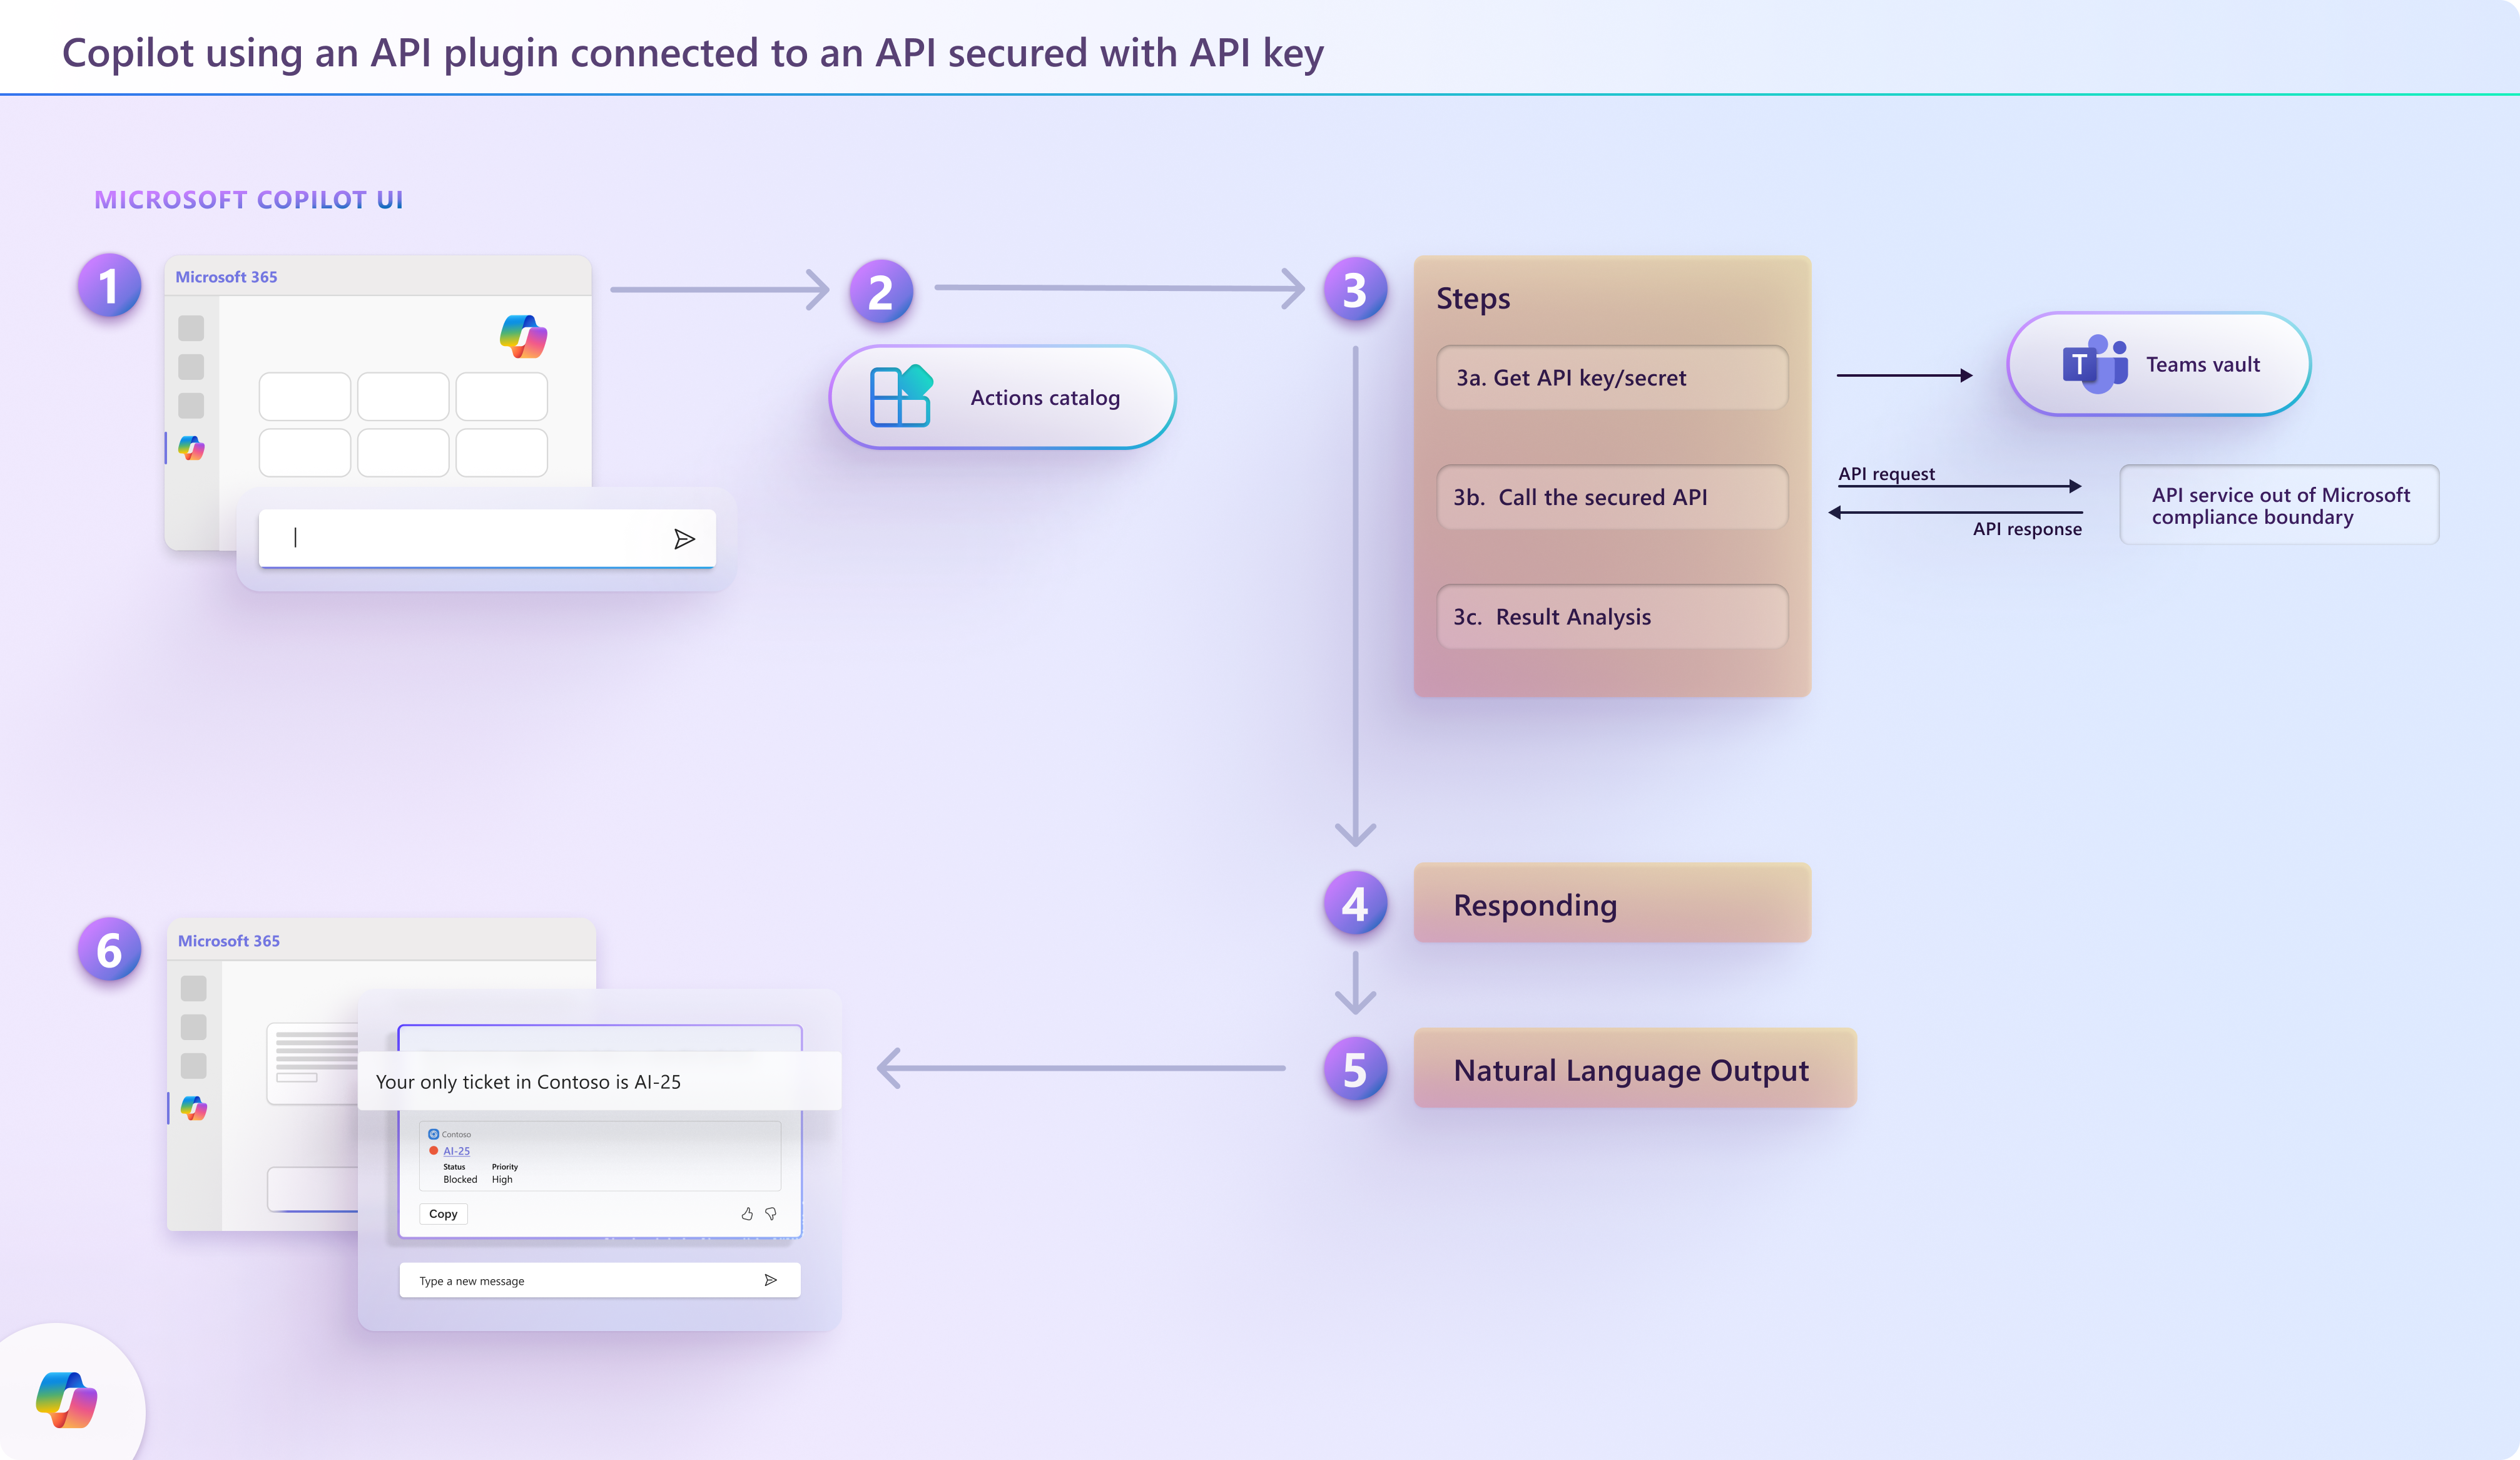
Exercise - Integrate an API plugin with an API secured with a key
API plugins for Microsoft 365 Copilot allow you to integrate with APIs secured with a key. You keep the API key secure by registering it in the Teams vault. At runtime, Microsoft 365 Copilot executes your plugin, retrieves the API key from the vault, and uses it to call the API. By following this process, the API key stays secure and is never exposed to the client.
Before you start: prerequisites
Create a new project
Creating a new API plugin for Microsoft 365 Copilot. Open Visual Studio Code.
I needed these installed/ready first, or the steps below will fail:
- Visual Studio Code - Download from Visual Code.
- Node.js (LTS version) — required to run the project.
- The "Microsoft 365 Agents Toolkit" extension
- A Microsoft 365 tenant/account with Copilot enabled — this is usually provided to you as part of the exercise.
Enabling Copilot: Get a tenant as regular user with Free Trial Version (if you don't have one) - This is for regular users.
- Go to the Microsoft 365 - Office 365 E5 Trial
-
Enable custom app upload/sideloading (needed for testing your agent). This is the setting that actually matters for the exercise (letting VS Code push your test agent into Copilot):
-
Go to the Microsoft 365 TEAMS admin center Documentation
- Sign in as the Global Admin
- Navigate to Settings → Integrated apps
- On the right, click Upload custom apps
- Make sure sideloading/custom app deployment is allowed for your test account — for a Developer Program tenant this is typically already on
Trouble shooting : Enable Custom App Upload
- Go to the Teams admin center instead: https://admin.teams.microsoft.com (separate portal, same login)
- Teams apps → Setup policies
- Click on the Global (Org-wide default) policy
- Find "Upload custom apps" toggle → turn it On
- Save
In Visual Studio Code:
-
In the Activity Bar (side bar), activate the Microsoft 365 Agents Toolkit extension. That's the thin vertical strip of icons on the far left edge of VS Code. After installing the extension, you'll see a new icon there. it usually looks like a small logo/robot-ish icon. Click it. This opens the "Microsoft 365 Agents Toolkit" panel.
-
In the Microsoft 365 Agents Toolkit extension panel, choose Create a New App.
- From the list of project templates, choose "Declarative Agent".
- Choose the Add Action option.
- Choose the Start with a new API option.
- From the list of authentication types, choose API Key.
- As the programming language, choose TypeScript.
- Choose a folder to store your project.
- Name your project da-repairs-key.
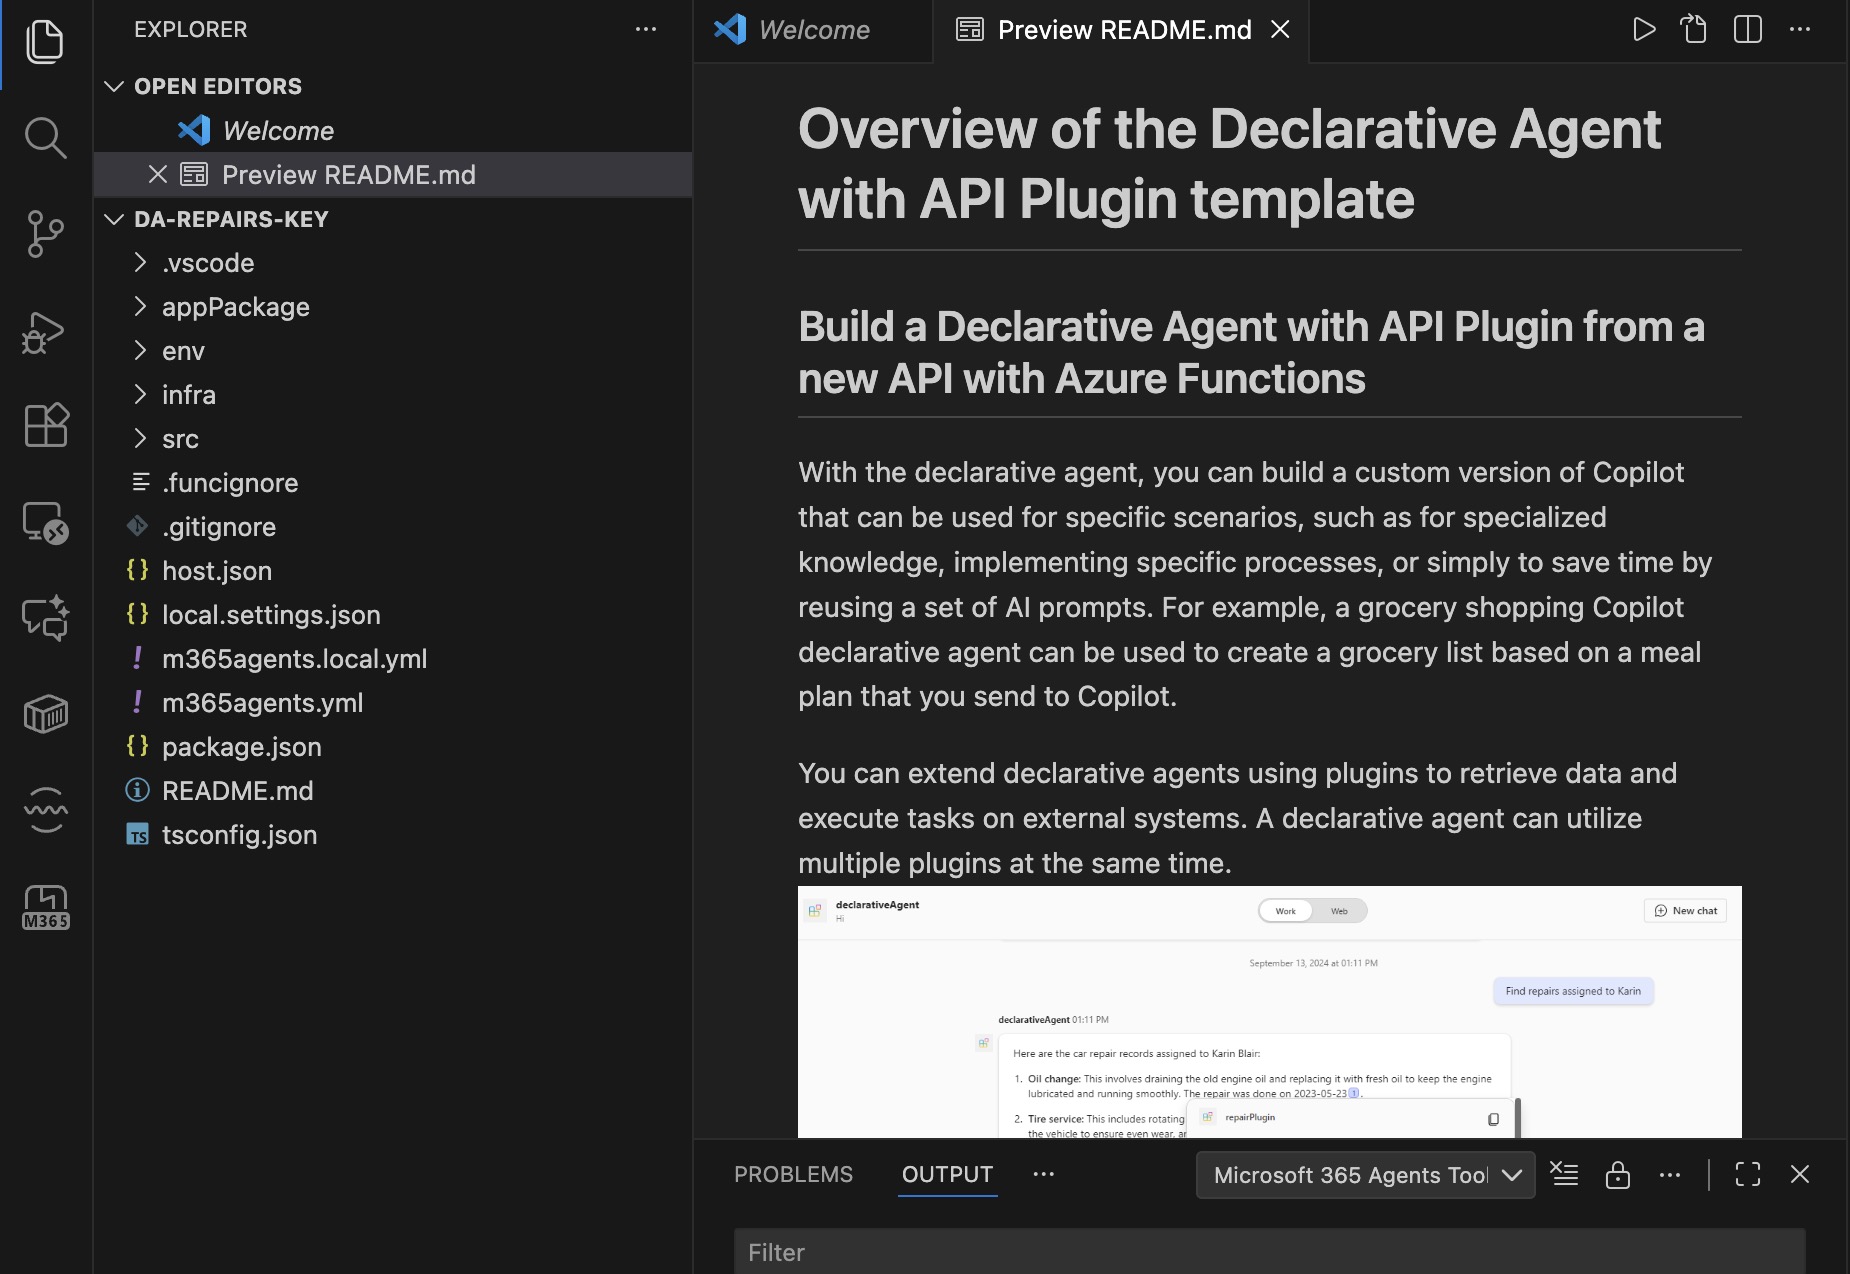
Examine the API key authentication configuration
First, have a look at how API key authentication is defined in the API definition.
In Visual Studio Code:
- Open the appPackage/apiSpecificationFile/repair.yml file. This file contains the OpenAPI definition for the API.
- In the components.securitySchemes section, notice the apiKey property:
The property defines a security scheme that uses the API key as a header in the authorization request header.
- Locate the paths./repairs.get.security property. Notice that it references the apiKey security scheme.
paths:
  /repairs:
    get:
      operationId: listRepairs
      summary: List all repairs
      description: Returns a list of repairs with their details and images
      parameters:
        - name: assignedTo
          in: query
          description: Filter repairs by who they're assigned to
          schema:
            type: string
          required: false
      security:
        - apiKey: []
Examine the API implementation
Next, see how the API validates the API key on each request.
In Visual Studio Code:
- Open the src/functions/repairs.ts file.
- In the repairs handler function, locate the following line which rejects all unauthorized requests:
 // Check if the request is authorized.
  if (!isApiKeyValid(req)) {
    // Return 401 Unauthorized response.
    return {
      status: 401,
    };
  }
- The isApiKeyValid function is implemented further in the repairs.ts file:
function isApiKeyValid(req: HttpRequest): boolean {
  const apiKey = req.headers.get("X-API-Key")?.trim();
  return apiKey === process.env.API_KEY;
}
This code shows a simplistic implementation of API key security, but it illustrates how API key security works in practice.
Examine the vault task configuration
In this project, I use Microsoft 365 Agents Toolkit to add the API key to the vault. Microsoft 365 Agents Toolkit registers the API key in the vault using a special task in the project's configuration.
In Visual Studio Code:
- Open the m365agents.local.yml file.
- In the provision section, locate the apiKey/register task.
  # Register API KEY
  - uses: apiKey/register
    with:
      # Name of the API Key
      name: apiKey
      # Value of the API Key
      primaryClientSecret: ${{SECRET_API_KEY}}
      # app ID
      appId: ${{TEAMS_APP_ID}}
      # Path to OpenAPI description document
      apiSpecPath: ./appPackage/apiSpecificationFile/repair.yml
    # Write the registration information of API Key into environment file for
    # the specified environment variable(s).
    writeToEnvironmentFile:
      registrationId: APIKEY_REGISTRATION_ID
The task takes the value of the SECRET_API_KEY project variable, stored in the env/.env.local.user file and registers it in the vault. Then, it takes the vault entry ID and writes it to the environment file env/.env.local. The outcome of this task is an environment variable named APIKEY_REGISTRATION_ID. Microsoft 365 Agents Toolkit writes the value of this variable to the appPackages/ai-plugin.json file that contains the plugin definition. At runtime, the declarative agent that loads the API plugin, uses this ID to retrieve the API key from the vault, and call the API securely.
Configure API key for local development
Before you can test the project, you need to define an API key for your API. Then, store the API key in the vault and record the vault entry ID in your API plugin. For local development, store the API key in your project and use Microsoft 365 Agents Toolkit to register it in the vault for you.
In Visual Studio Code:
- Open the Terminal pane.
- In a command line:
- Restore project's dependencies, by running
npm install. - Generate a new API key by running:
npm run keygen. - Copy the generated key to clipboard.
- Restore project's dependencies, by running
- Open the env/.env.local.user file.
-
Update the
SECRET_API_KEYproperty to the newly generated API key. The updated property looks as follows: -
Save your changes.
Each time you build the project, Microsoft 365 Agents Toolkit automatically updates the API key in the vault and updates your project with vault entry ID.
Test the declarative agent with the API plugin in Microsoft 365 Copilot
The final step is to test the declarative agent with the API plugin in Microsoft 365 Copilot.
In Visual Studio Code:
- In the Activity Bar, activate the Microsoft 365 Agents Toolkit extension.
-
In the Microsoft 365 Agents Toolkit extension panel, in the Accounts section, be sure you're signed in to your Microsoft 365 tenant with Copilot enabled.

-
In the Activity Bar, switch to the Run and Debug view.
- From the list of configurations, choose Debug in Copilot (Edge) and press the play button to start debugging.

- Visual Studio Code opens a new web browser with Microsoft 365 Copilot. If prompted, sign in with your Microsoft 365 account.
In the : web browser DEV.TEAMS
- From the side panel, select the da-repairs-keylocal agent.
- In the prompt text box, type What repairs are assigned to Karin? and submit the prompt.
- Confirm that you want to send data to the API plugin using the Always allow button.

- Wait for the agent to respond.
- Aprouval on: https://admin.cloud.microsoft
- Agents --> All Agents
- Testing your chat (https://m365.cloud.microsoft/chat/)
Integrate an API plugin with an API secured with OAuth
To get an access token, you register an application with the identity provider and specify its type, such as public- or confidential client.

I register my development OAuth information in the vault myself, either manually by going to the:
- Teams Developer Portal and from the Tools section opening OAuth client registration, or using Microsoft 365 Agents Toolkit.
- In production, typically an administrator registers the OAuth information and gives you the ID of the vault entry to use in your API plugin.
